Reward
- 2 Quest Points.
- 2 10,000 XP Lamps.
- Key ring to store multiple Keys.
- Ability to craft Potlids.
- Access to Gnome Glider to Feldip Hills (south of Gu'Tanoth). |
 Start Point Start PointYanni Salika in Shilo Village. Members Only |
Length:

Difficulty:
 |
Requirements
Skill: 25 Crafting, 18 Herblore, 36 Agility, 30 Smithing.
Quest: Rune Mysteries Quest, Druidic Ritual, Shilo Village.
Item: 4 Steel Bars, 1 Iron Bar, 1 Bronze Bar, Hammer, Clay Bowl filled with Water, 2 Guam Leaves, 1 Marrentill, 1 Harralander, 1 Empty Teacup (obtained during quest), Tinderbox, Chisel, 210GP, Woodcutting Axe, 5 Pigeon Cages (obtained while in East Ardougne).
Other: Ability to defeat Slagilith (Level-92).
Recommendations
Skill: 60+ Combat, 43 Prayer, 58 Magic plus completion of the Watch Tower Quest.
Item: Armour (Adamant or better), Weapon (Dragon or better), 2 Cut Jades, 2 Cut Red Topazes, 2 Cut Opals, Enough Teleport Runes for about 15 teleports to various locations, Amulet of Glory(4), Energy Enhancing Items (Energy Potions, Boots of Lightness, Spotted/Spottier Cape).
"If you're fresh to Shilo Village after solving the mystery (or even if you did it some time ago), you may like to check out Yanni Salika's antiques shop. He's a busy chap revamping antique items, checking out new stock from potential adventurers and maybe he'll have a small(1) favour to ask of you? Probably nothing particularly large, Yanni isn't a demanding(2) person, should hardly take you any time(3) at all really, something to do when you have a spare moment. That's assuming there aren't any complications."
1: - Perception of the word "small" may be open to interpretation.
2: - In a recent vote, Yanni Salika was only voted the second most demanding person in Shilo Village.
3: - As everyone knows, time is relative.
Part 1:
The Journey of a Thousand Miles
Keep your weight to a minimum throughout; lots of running involved.
Step 1
Talk to a Forester.
Talk to Captain Shanks.
Journey to Port Sarim and Brian's Axe shop.
Items needed: 25gp.
You begin your quest in Shilo Village. To the south-east of the gem rocks is a small antique store owned by Yanni Salika. If you ask him if there is anything else to do in the village, he will be slightly offended at the comment but mention that he has a small favour to ask from you. He will tell you that he needs a rare mahogany finish for one of his antiques and will ask you to fetch the materials from one of the Jungle Foresters outside the village to the south. Before you leave go to the Shilo Village Fishing shop and go upstairs. Talk to Seravel and purchase a ticket for the 'Lady of the Waves'. This will help you later on.
Exit the village to the south-east by opening the gateways, avoiding the undead and searching the cart to hop over it. Travel to the south a few steps and to the west where you will see one of several Jungle Foresters. He will be glad to give you some mahogany. However, he needs you to get his axe sharpened first. Towards the west is Captain Shanks of the "Lady of the Waves." He will tell you to speak to him since he can easily stop in Port Sarim and have Brian in the Axe Shop sharpen it for him.
Head straight west in a line until you reach the ocean. Just to the north amidst crates and boxes is a ladder leading upwards. Here you will find Captain Shanks. After talking to him, you will realize that he wants nothing to do to help you and that if you want an axe sharpened, you can take it to Brian yourself! Hopefully you bought a ticket to the Lady of the Waves earlier. If you did you can use it with the captain to go to Port Sarim.
Brian's axe shop is in the northern area of Port Sarim near the rune shop and the bar. Once you speak to Brian, you will learn that he is in no mood to sharpen any axe since he is concerned about his friend and some trouble that he is in. He needs you to do him a small favour and speak to Aggie the witch in Draynor Village. He needs to act as a character witness for his friend.
Step 2
Talk to Aggie.
Negotiate Jimmy's Release.
Talk to Fred the Farmer.
Talk to Seth.
 From here head north-west to the road and then eastward into Draynor Village. Aggie the witch is located to the north of the bank. When you speak to Aggie the witch, she is also concerned about the safety and welfare of her new apprentice, Jimmy the Chisel. Dumb street-name aside, he was recently sent to Lumbridge for supplies and has not returned as of yet. She is concerned about some increased activity between Draynor Village and Lumbridge near the spiders and the goblins. In return for her acting as a character witness for Brian, she needs you to investigate the area and find out information on Jimmy's whereabouts.
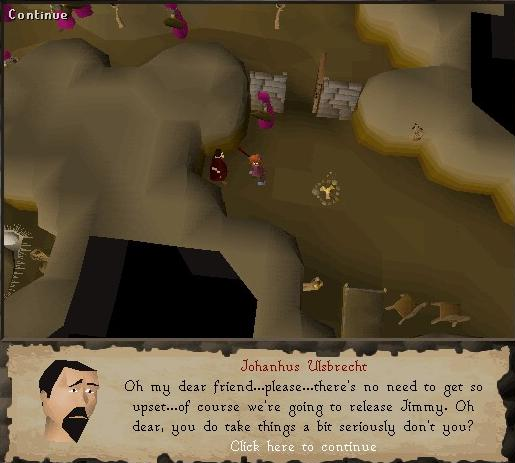
Head straight east from Draynor Village past the jail guards and you will find the entrance to the H.A.M. Headquarters. The entrance to the cavern will appear as an exclamation point on your mini-map. Right click the trapdoor and select pick lock in order to open the door up. Once inside, head to the south-east corner of the cavern and you should see a H.A.M. member dressed in darker robes. This man is Johanhus Ulsbrecht. He lets you know that he has Jimmy and that he will become a H.A.M. member in time. This is a nice way of saying that he will keep Jimmy locked up in a jail cell until he finally breaks. If you negotiate for Jimmy's release, Johanhus will mention that he will be glad to release Jimmy in return for one month's supply of chickens from Fred the Farmer, Jimmy's brother.
Exit the cavern the way you entered and head to the east until you reach the chicken (and sheep) farm of Fred the Farmer. You may remember this man from the Sheep Shearer quest. He will give into Johanhus' request/ransom demand but he lacks the number of chickens that H.A.M. needs. He will direct you further to the east to Seth Groat's farm. He has enough chickens and he should be able to spare the chickens needed to negotiate Jimmy's release.
Step 3
Grab an Empty Teacup.
Talk to Horvik.
Talk to the Apothecary about the Herbal tincture.
Items needed: 3 Steel Bars, Clay Bowl, Pickaxe, Woodcutting Axe, Tinderbox, 2 Guam Leaves, 1 Marrentill, 1 Harralander.
Head to Varrock. While you are still here be certain to head to the south-east and steal a cup of tea from the tea cart. Go ahead and drink the tea so you have an empty cup. While you are here, withdraw: three steel bars, a clay bowl, a pickaxe, a woodcutting axe, a tinderbox, two Guam Leaves, one Marrentill and one Harralander.
Head now to Horvik's shop and ask him about the chicken cages. Horvik will complete the order for Seth as long as he is paid for his previous work. Lo and behold, you have the three steel bars required. Sadly, Horvik is too ill to handle anything other than simple trading. He needs some herbal tincture and some breathing salts from the apothecary. He will also mention that he can make chicken cages for you but he will require five pigeon cages. But he won't do that until he gets something for his sickness (Picture).
Go to the south-western section of Varrock and speak to the apothecary. He listens to what you need and hands you a vial of herbal tincture. He then remembers that you need breathing salts. But he drops the pot on the floor and shatters his last airtight pot! He can not get you the salts because they will not last long in a non-airtight container. He directs to the Barbarian Village to speak to Tassie in the pottery hut. She is well trained enough to craft a new pot lid.
Part 2:
From Varrock to Feldip Hills
Step 4
Talk to Tassie Slipcast about the Potlid.
Talk to Hammerspike.
Speak to Sanfew in Taverley.
Make a Guthix Rest.
Speak to the Gnome Pilot.
Items needed: Clay Bowl filled with Water, 2 Guam Leaves, 1 Marrentill, 1 Harralander, 1 Empty Teacup (obtained during Quest), Tinderbox, Chisel, 10GP, Woodcutting Axe.
Now head westward to the Barbarian Village and speak to Tassie Slipcast. She is quite angry at your urgency since she has a lot on her mind. It seems that Hammerspike Stoutbeard, a local Dwarven gangster has been steadily raising the price on the loan she took out in order to use the hut as a pottery store. She needs someone to speak to Hammerspike and convince him to leave her alone.
Head west out of the Barbarian Village and north-west up to the entrance to the Dwarven Mines. When you climb down into the caves, head south and then west past the anvils, the fires and Boot. You will enter a new area which is a multicombat zone. Find Hammerspike and talk to him. He seems rather mean at first but after you ask him several questions about Tassie and his choice of profession, he will mention to you that he has always wanted to be a druid. He dreams of the day where he can wear the white robes of the order and sit amongst the many herbs. If you agree to help him, one of his guards will yell out, "Ha ha! Good one boss! I can't believe he fell for that!" This is going to be a long, long quest...
Go to Taverley and speak to Sanfew on the second floor of the Herbalist shop. Sanfew will advise you that he will consider letting Hammerspike become an initiate if you do two favours for him. Before you have a chance to object, he interrupts you and instructs you to go to the White Wolf Mountain and bring the gnome pilot a cup of Guthix Rest Tea. He will also ask you to convince the pilot to open up a permanent Glider pathway from the mountain to Feldip Hills so he can spread the gospel of Guthix to the naturally dimwitted ogres. He will get you the recipe for Guthix Rest and send you on your way.
Outside the store, go to the fountain and fill up your clay bowl with water. Chop down a tree of any kind and light the logs on fire. Use your bowl of water on the fire and you will receive a bowl of hot water. Use the bowl of hot water on the empty tea cup and then use your four herbs on the water filled cup. You should receive Guthix Rest (3). Now travel to the west and climb up the mountain until you reach the gnome pilot.
Note: It is essential that you follow Sanfew's recipe exactly the way he gave it to you, or you might waste herbs by doing it wrong.
Speak to the gnome pilot, and choose the second option that appears to give him the Guthix Rest. He will thank you for the cup and will gladly open up a flight path to Feldip Hills once the landing strip there is completed. But in order to make such a long flight, he will need a lighter kit. He will instruct you to speak to Arhein in Catherby about T.R.A.S.H. (Triple Redundant Aero Super Hawsers.) T.R.A.S.H. is actually lighter but much stronger rope that will allow his glider to make the journey.
Step 5
Speak to Phantuwti Fanstuwi Farsight.
Enter the Cave and inspect the Statue.
Speak to Wizard Cromperty.
Head north-west and west into Seers' Village and go to the house just south of the bar. Inside you will find Phantuwti Fanstuwi Farsight, a recent addition to the Seers in the village. As you speak to him, he claims that he already knows why you have arrived. But he can not produce a weather report for you since he is more concerned about the safety of a young girl named Petra who has gone missing. He knows that she is inside a cave to the south-west of your current location. You will not have to go any farther south than Ardougne or any farther west than the Training Grounds. It seems that Phantuwti answers every question with a cryptic response.

The cave Phantuwti is referring to is the goblin cave just to the east of the Fishing Guild. Enter the cave and head straight north. In the north-eastern section of the cave is a small chamber. As you enter the chamber, a brief cinematic will show that there is a human form trapped inside the eastern wall. Approach the sculpture and search it. You will find a note sticking from her belt that reads:
"...problems report to Wizard Cromp..."
"...rently in residence in Ardoug..."
Go to Ardougne and head north east. The building that Wizard Cromperty is in has blue and white tiles that are rather hard to miss on your mini-map. Speak to the Wizard and he will whine briefly about the time it will take to head to Port Khazard and obtain material components for the spell. He just needs one ingredient, iron oxide. The man who has the iron oxide is an antique dealer by the name of Tindel Marchant.
Step 6
Talk to Tindel.
Talk to Rantz.
Talk to Gnormadium Avlafrim.
Repair the lights.
Head south from East Ardougne down the coastline until you reach Port Khazard. Tindel is located to the very far east on the southern piers. He has only one vial of iron oxide remaining since it is a popular component for magical spells. And he will be glad to give it to you in exchange for... one small favour! It seems that he has not been sleeping well at night due to the condition of his mattress. If you were to be kind to speak to Rantz the ogre and get him to fill the mattress with Chompy Bird feathers, he will give you the rust, er, iron oxide. He will hand you a Stodgy mattress which is actually quite heavy.
Head straight south, past the mining area and past Yanille and follow the coastline to the west. Go south past the small encampment near the cavern entrance and east again until you are in Feldip Hills. You should see the quest symbol on your mini-map. This is where Rantz is located at. Rantz is very upset at the loud noise coming from the little guy nearby. All the noise is scaring off the "flappers". If you can convince the little guy to stop all the racket, he will fill the mattress with feathers.
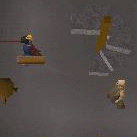
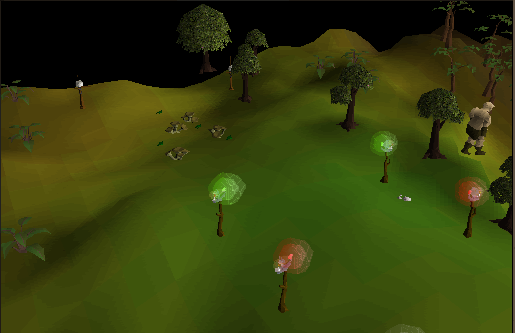
Head straight west until you see an area in your mini-map which is greener than the rest of the land. This is the landing strip that the gnome pilot on White Wolf Mountain was referring to. The pilot here, Gnormadium Avlafrim is nearly completed with the landing strip. After choosing the available responses, he will let you help him complete the task. To the east are a total of eight lights. Search the westernmost landing light, and you will obtain an uncut sapphire. Speak to Gnormadium again and he will sell you a chisel for 10 gold pieces. Pay the gold to the gnome and use the chisel on the sapphire to cut it and use the sapphire on the light you took it from. It will inform you that you have fixed one of the lights.
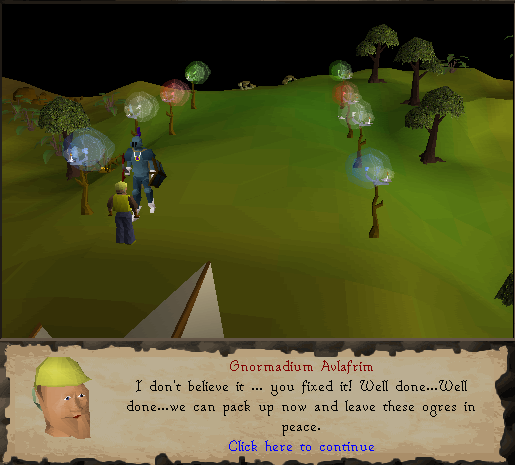
Repeat the same thing on the other seven lights. Be careful though. The lights to the east of the western most light contain jade, red topazes and opals (from east to west). It is possible to smash the gemstone while cutting them (Picture). If you are successful in repairing all eight lights, speak to Gnormadium again and tell him the lights are fixed (Picture). In another brief cinematic, you will see the lights brighten up and the work is now completed (Picture). Gnormadium's work here is done so Rantz will receive his peace and quiet.
Now it's time to work backwards and claim all the favours.
Part 3:
Homeward Bound ...
Step 7
Receive the Mattress.
Trade the Mattress for Iron oxide.
Receive the Animate rock spell.
Defeat the Salgilith and release Petra.
Fix the weathervane, and receive the Weather report.
Items needed: Armour, Weapon, Food for the upcoming battle.
Head east again back to Rantz. When you speak to him, let him know that the gnome's work is completed. He will be happy that he can at least attempt to hunt his "flappers" and will take the stodgy mattress and replace it with a comfy mattress. Head back to Port Khazard. Speak to Tindel again and he will trade the iron oxide in exchange for the comfy mattress.
Head to Jerico's home which is located near the furnace in East Ardougne. Go to the back of his house and pick up five pigeon cages for Horvik. Now, head to Wizard Cromperty to the east. He will take the iron oxide from you and give you an animate rock spell in return. It seems that if a teleport spell is not cast correctly, you have a chance of being in the middle of rock and becoming stuck there.
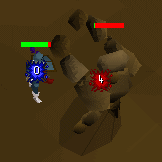
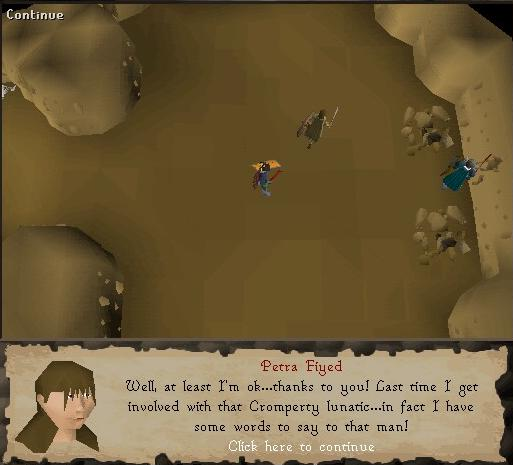
Exit Ardougne to the north and reenter the goblin cave near the Fishing Guild. Return to the north-eastern cavern and stand near the statue form of Petra. Click the animate rock spell and you will say some magical words, shoot out a powerful stream of magic that explodes in a huge eruption... and accidentally animate a boulder to the side of the statue. The animated boulder is a Slagilith (Level-92) (Picture). Defeat the monster and you will receive an Adamantite ore, an uncut ruby and an uncut diamond. Now recast the spell after defeating the Slagilith and you will cast the spell property. Petra, after cursing out Cromperty, will leave immediately to Seer's Village (Picture).
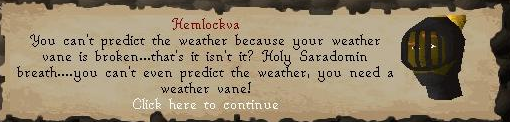
Following her wise decision, exit the goblin cave and head north-east to Seers' Village and head to Phantuwti's house. He will acknowledge that Petra has returned to the village, but he can not give you the forecast. After questioning him, he will tell you that his mystical source of weather knowledge is currently broken. After pressuring him with firm words and threats he will finally admit that his weathervane is broken (Picture). It is located that the top of the house.
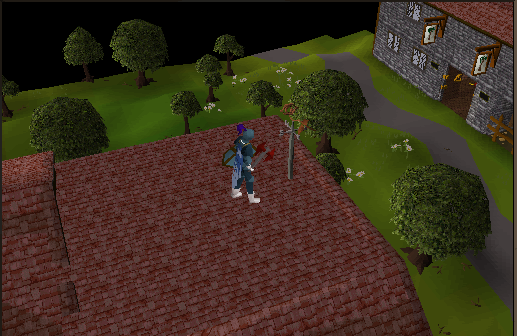
Exit the house and get your hammer and one bronze bar, one iron bar and one steel bar. Enter the house where you would go upstairs to spin flax into bow strings. Go up one more story to the roof and head west to the weathervane (Picture). The weathervane secured very solidly to the roof when you attempt to search it. Use your hammer on the weathervane and search it again. You will receive a bronze ornament, an iron crossbar and a steel pole. Head back down the ladders to the ground floor and head north to the anvils. While you have the various bars in your inventory, use each piece of the weathervane on the anvils and you will repair the individual pieces. Head back to the roof and use each piece on the weathervane. It will begin to move again with the wind and you will discover it is now repaired. Return to Phantuwti and tell him that the weathervane is repaired. He will finally give you the weather report (Picture).
Step 8
Speak to Arhein.
Speak to the Gnome.
Speak to Sanfew about letting a Dwarf into the Druidic circle.
Threaten Hammerspike to leave Tassie alone.
Make a potlid.
Give Horvik the medicine and receive the Chicken cages.
Exit Seers' Village to the east, go past Camelot and head south-east back into Catherby. Speak to Arhein and he will tell you that it is almost impossible to have the druids responsible for bad weather. Now he can confront the druids if there are any problems with his shipments. He tells you that the T.R.A.S.H. has been delivered to the gnome and you should go there and speak to the gnome.
Head eastward along the coastline and north up the face of White Wolf Mountain. Speak to the gnome pilot and he will tell you that the flight path to Feldip Hills has been opened and he will be able to fly that "yakking druid" to the south. Go let Sanfew know. Head to the east and back down south the other side of the mountain back to Taverley. Speak to Sanfew again on the second floor of the herbalist shop. He will thank you for speaking to the gnome pilot on his behalf and delivering the Guthix Rest. In exchange, he will accept a dwarf as an initiate in the Druidic Circle.
Head back to Hammerspike in the Dwarven Mines. He will laugh at you and say that he decided to remain a gangster, and that he won't stop bothering Tassie either. Time to let out a little pent-up frustration! Surrounding Hammerspike are three Dwarven gang members. Kill all three of them. They will not put up much of a resistance against you. Once you have killed the third guard, speak to Hammerspike again. It seems that he isn't very tough without his guards there to protect him. He will agree to release Tassie from the debt but he will vow revenge on you.
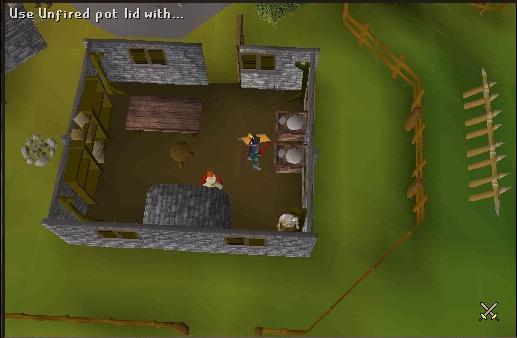
Exit the Mines by way of the ladder and travel south-east back into the Barbarian Village. Speak to Tassie and she will be happy that her obligation has been voided. In return, she will teach you how to make pot lids. She will also give you a free piece of soft clay so you don't have to mine another piece of clay. Use the clay on the potter's wheel and you will receive an option to make clay lids. Use the soft clay lid on the oven and you will obtain a pot lid (Picture).
Go Varrock and stop in the General Store and buy a pot from the vendor. Now go back to the apothecary to the south-west and speak to him. You will hand him the lid and the pot and you will receive a pot filled with breathing salts. Head east through Varrock and speak to Horvik. You will hand him the breathing salts and the herbal tincture and he will thank you for the medicine. Speak to him again and he will take the five pigeon cages from you and in return give you five chicken cages.
Part 4:
The Home Stretch
Step 9
Deliver the Chicken cages.
Talk to Johanhus about Jimmy's release.
Talk to Aggie.
Receive the sharp axe from Brian.
Give the axe to the Forester.
Give the Mahogany log to Yanni Salik.
Items needed: 200GP.
Head back to Seth Groat's farm. He will take the chicken cages from you and let you know that he will arrange the delivery of a month's supply of chickens to the H.A.M. cult. You do not have to return to Fred the Farmer. You may go directly to Johanhus (Picture).
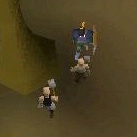
Travel westward back to the entrance of the H.A.M. cult and pick the lock on the trapdoor. Once inside, head to the south-east section of the cavern and speak to Johanhus again. He will tell you that he has received the shipment of chickens. He agrees to let Jimmy the Chisel go. You kindly let Johanhus know in return that if Aggie says he did not return, you will be back (Picture).
Exit the cavern and travel westward to Draynor Village. Speak to Aggie and she will confirm that Jimmy has returned and she will be happy to appear as a character witness for Brian in Port Sarim.
Leave Draynor Village and head westward, back to Port Sarim. When you speak to Brian he will let you know that his friend has decided to leave and was last seen in the middle of the lava maze in deep Wilderness... Just kidding! He thanks you and hands you a sharpened axe.
From here, take a ship to N. Karamja and head westward to Brimhaven. Once you arrive there, speak to Hajedy the cart driver and arrange a trip to Shilo Village. Once you arrive, exit the village by searching the cart and speak to one of the Jungle Foresters. He will mention how long it took to get the axe sharpened and that he could have easily done it himself. Wisely, he sees you getting angry (Picture), shuts up, and hands you the mahogany logs.
Leap the cart one final time and dodge the undead to reenter Shilo Village. Head back to Yanni's antique shop and speak to him. He will thank you for retrieving the logs. After a few seconds, he will ask why you seem upset; it was only a small favour. Seeing that you are still upset, he will hand you a key ring to help you store your keys. After explaining to him everything you had to go through in order to give him the logs, he will finally give you two antique lamps.

Frequently Asked Questions
Q: How many keys can I place on the key ring?
A: The maximum is currently ten. Disposable keys such as the crystal key for the Dragonstone chest in Taverley or the Muddy key can not be attached to the ring. Only permanent keys like the Dusty Key or the Maze Key may be attached to the ring.
Q: Can you remove keys from the key ring once attached?
A: Yes. You do have the option of removing keys from the key ring if you click it.
Q: What exactly does Guthix Rest do to you?
A: Guthix rest cures some poison, restores some run energy and boosts max hit points by 5 if you are at full health.
Q: Why can't I use the lamps to raise my skills?
A: You need to have a minimum of level 30 in the skill you wish to use the lamp on.
Q: How can I get another key ring?
A: Go back to the antique store and buy one. If you want multiples, drop and buy again. When you add a key, it'll add it to both key rings, and when you take one off, it will remove from both, to prevent players from duplicating keys. |


 OSRS RuneScape Help
 RuneScape Community Forums
 Skill Guides
 Quest Guides
 City Guides
 Guild Guides
 Mini Game Guides
 Treasure Trail Help
 Miscellaneous Guides
 Dungeon Maps
 Mining Maps
 Items Database
 Monsters Database
 Shops Database
 Tome/Books Database
 Skill Calculators
 Coordinate Locator
 Zchat Clan Chat
 Stuck on something? Want some more tips? Ask on our forums.

