Reward
- 1 Quest Point.
- 1,000 Crafting XP and Thieving XP.
- Access to Uzer by the Magic Carpet outside Shantay Pass.
- Optional reward of 2 Cut Sapphires, 2 Cut Emeralds and 2 Cut Rubies. |
 Start Point Start PointThe ruins of Uzer, in the desert east of the Shantay Pass. Talk to the Golem. Members Only |
Difficulty:

Length:
 |
Requirements
Skill: Level-20 Crafting, Level-25 Thieving.
Item: Four pieces of Soft Clay, Pestle and Mortar, Empty Vial, Papyrus, A small amount of Gold, A Pickaxe.
Recommendations
Skill: Level-25 Magic (for Varrock Teleport).
Item: Energy Enhancing Items (Boots of Lightness, Strange Fruit, Energy Potions, etc), Full Desert Clothes, 2-3 Full Waterskins, Teleport Runes for Varrock (Or Teleport to House Runes if you have a Varrock Portal), Ring of Dueling (with at least three charges), Hammer and Chisel if you want a bonus gem reward.
Deep in the desert stand the ruins of the once-great city of Uzer, where a lone survivor, an ancient clay golem, forever paces to and fro. It is badly damaged, and its mind cannot rest until it has completed the task for which it was created.
It is up to you to uncover the secret of the lost city, and add the final chapter to a story started in the violence of the Third Age.
Part 1:
The Ruined City of Uzer
Step 1
Travel to Uzer.
Speak to the Golem.
Collect the strange implement, several mushrooms and the letter.
 From Al-Kharid, venture south to Shantay Pass and purchase a Shantay Pass, two full waterskins, 4 clay and full desert clothes if you do not already have a set. Once you go through the pass, head directly to the east until you reach the western bank of a river. Follow the river a short distance to the south-east and you will find two bridges leading across the river. Cross the two bridges and continue to the east until you reach Uzer.
Note: You may want to purchase several Shantay Passes while you are here for later trips. Having your house located in the desert would be a good advantage, just bring Teleport to House runes.
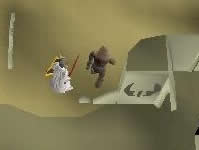
In the center of the ruins is a building with a staircase leading downward. Near this building is a clay golem wandering about. When you speak to the golem, it will inform you that it is seriously injured. The golem needs to be repaired, so when you next come into the desert have the clay ready to repair him with.
While in the area, head down the staircase. You will find yourself in a large antechamber. Several level 19 Ghosts can be seen here, but they are of no threat. In the north-western section of the
 antechamber, a strange implement can be picked up. It looks suspiciously like a key. Throughout the antechamber, you will find patches of black mushrooms. Go ahead and pick yourself two or three of them.
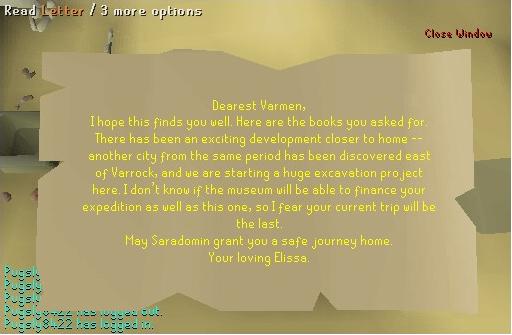
Exit the antechamber back up the staircase. To the west of the building, you will find a letter lying on the ground (look for the red dot on the mini map) (Picture). Reading the letter, you will discover that it was written by Elissa, one of the archeologists from the Digsite located to the south-east of Varrock. Speaking to her will enlighten your situation.
Part 2:
The Story of Varmen
Step 2
Head to Varrock.
Speak to Elissa.
Read Varmen's notes.
Make your way to Varrock. Go to one of the two banks and withdraw a pickaxe. While you are here, withdraw your pestle and mortar and an empty glass vial. Go south-west of the city to the mining area and mine yourself four pieces of clay. Go to the general store in Varrock and purchase a jug. Use the jug on the fountain near Horvik's shop and use the jug of water on the clay to make soft clay. Do the same thing with the other three pieces of clay so you have four pieces of soft clay.
Note: Use your teleport runes to arrive in Varrock quickly.
Leave Varrock from the east and walk south until you reach the entrance to the Digsite (south-east of SE Varrock Mines). Enter the Digsite and walk up to the northern section of the Digsite. Elissa is located near the northernmost dig site.
When you speak to Elissa, ask her about the letter with her name on it. She will tell you that Varmen is her late husband who was sent to Uzer for an expedition. Sadly, the Museum of Varrock did not have enough funding to support many expeditions so he was only able to go one time. She will tell you that Varmen's notes of the expedition are located in the library of the Exam Centre.
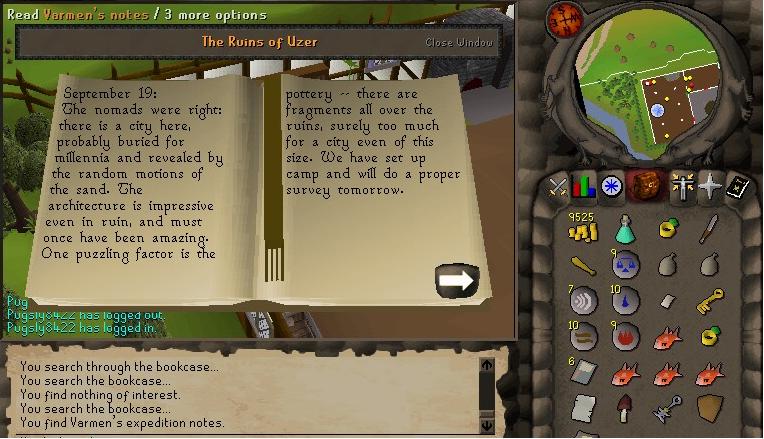
Head back to the south and enter the large building located to the east of the entrance to the Digsite. In the south-eastern section of the building are several bookcases. Search the bookcase against the southern wall in the corner. You may have to rotate your camera to the south to view it properly (Picture).
The notes will talk briefly about the city of Uzer. The inhabitants of the city were skilled craftsmen and knew enough about magic to create golems. The golems were used to defend the city against outside forces. It would seem that the city was attacked by a powerful demon and all but one golem were destroyed. The book also goes on to describe golems. They are mindless artificial beings created made to follow the orders of its creator. In order to command a golem, an instruction must be written on a piece of papyrus and inserted into the skull of the golem. A special ink must be used to write the instructions with a phoenix's feather as the quill. Now that you have a little more information, it is time to repair the golem
Part 3:
The Golem's Task
Step 3
Head back to Uzer.
Repair the golem.
Speak to the golem.
Return to Uzer by re-entering the Shantay Pass and making your way through the desert, to the east. Upon arrival, use your soft clay with the golem. With each piece of soft clay used you will noticed that the golem is becoming stronger. Once the final soft clay is used, a message will appear informing you that it is fully repaired. It will tell you that his task is not yet completed and the demon must be killed.
Note: Use a charged Ring of Dueling to teleport to the Al-Kharid Duel Arena. Shantay Pass is only a short walk to the south from here. Having your house located in the desert will also speed up travel, just bring Teleport to House runes.
Speak to the golem again and it will go into more detail about its task. Several thousand years ago, a great demon invaded Uzer and began slaughtering its inhabitants. The golems were ordered to defend the city and kill the demon. The demon was able to destroy the city and most of the golems before it was seriously injured. The demon retreated into the portal underground. Since the golem you repaired is at full health and demons heal very slowly, the golem will be able to slay the demon without any problem. All it needs you to do is open the doorway underground by turning the statuettes in the alcoves in the proper position. It does not know the proper positions of the statuettes however.
Step 4
Check the chamber.
Return to Varrock.
Steal the statuette from the Museum.
 Climb down the staircase and walk to the center of the antechamber. You will find two alcoves on both the western and eastern walls. However, one of the statuettes is missing. Since the Varmen expedition was funded by the museum of Varrock, you may have some luck searching there.
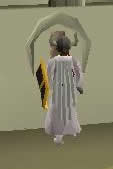
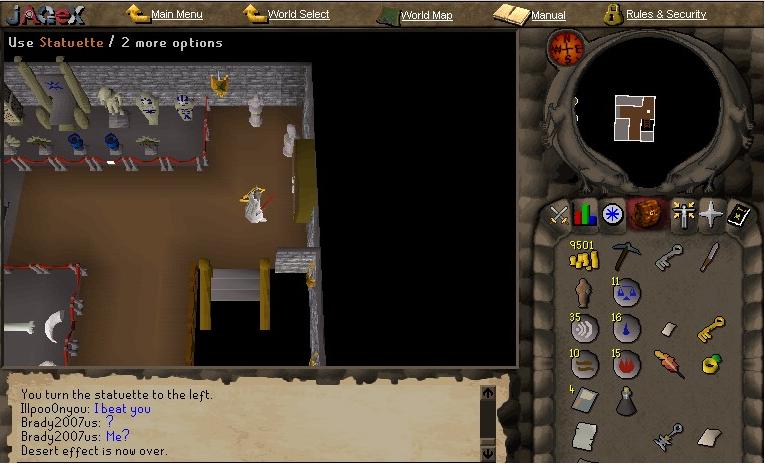
Make your way to Varrock and speak to the Curator in the Museum to the north of the eastern bank. The Curator will mention, if asked, that the statuette that you seek is located upstairs inside a display case. He will not let you have it even if it involves the destruction of a feared demon. Pickpocket the Curator and you will receive a small display key. Go upstairs, use the key on the display case and retrieve the statuette (Picture).
Note: Again, use your teleport runes to arrive in Varrock quickly. You may receive a message that the Curator has nothing of importance when you try to pickpocket him. Make certain that you have repaired the Golem with your soft clay and spoken to him about his task. You will also have to read Varmen's journal (or at least spoken to Elissa) to know that the Museum of Varrock funded the expedition. Once you have finished these steps, you will be able to speak to the Curator about the statuette.
Part 4:
Completing the Golem's Task
Step 5
Head back again to Uzer.
Position the statues accordingly.
Enter the door.
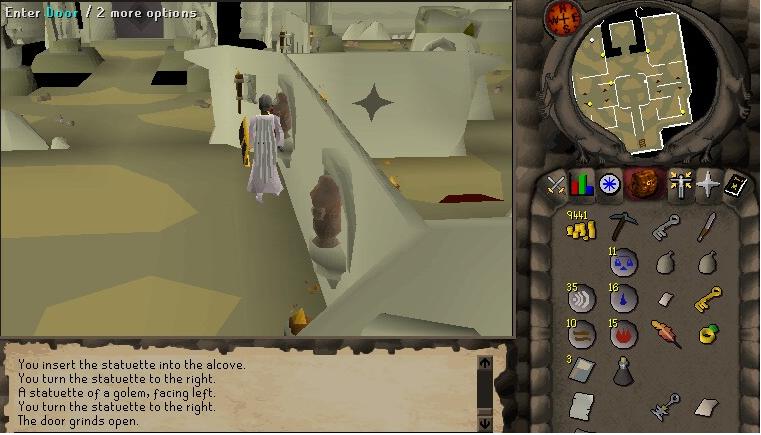
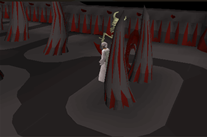 Make your way back to Uzer. Climb down the staircase and return to the central area with the alcoves. Use the statuette that you have in your possession on the empty alcove and you will place the statuette back where it belongs. Click on the statuettes so that all four statuettes are facing the door to the north (the eastern statuettes will be facing to the right, the western statuettes will be facing to the left). The doorway will open up. Click on the door to enter it (Picture).
Note: Again, use your Ring of Dueling to arrive in Al-Kharid and make your way to Shantay Pass. If you want to obtain the optional reward for the quest, be certain to withdraw a hammer and a chisel from the Al-Kharid bank before going through Shantay Pass. Shantay Pass is only a short walk to the south from here.
You will find yourself in a rather evil looking place with large bones jutting out of the floor. Near the spiraling portal you will find the skeleton remains of a demon. Examine the skeleton and will you learn that the demon the golem has to kill died a long time ago from its wounds. You may explore further to the north where you will find a jewel-encrusted throne. Click on the portal to exit and leave the antechamber back up the staircase.
While investigating the demon skeleton, head north to the gem encrusted throne. If you have both a hammer and chisel in your inventory, you can use the hammer on the throne to receive the optional reward for the quest.
Step 6
Speak to the golem.
Pluck a feather from the phoenix.
Create the ink and write new instructions for the golem.
Use the implement on the golem.
Speak to the golem and you will tell it that the demon is dead. But the golem can not confirm that the demon is dead. It can not go underground and if it can't see that the demon is dead, he will not accept your word. The golem will need some new instructions.
Walk far to the north-west until you reach the side of a mountain. Wandering nearby is a desert phoenix. Click on the phoenix and you will attempt to pluck a feather from the bird. Failure will result in minor damage and a three second stun. Once you are successful, you will have a phoenix feather in your inventory.
Use your pestle and mortar on a black mushroom. As long as you have an empty vial in your inventory, you will receive a vial of black mushroom ink. If you do not have an empty vial, the ink will spill to the ground and you will lose the mushroom. Use your feather with the vial of black mushroom ink and then use the feather with your piece of papyrus. You will write "YOUR TASK IS DONE" on the papyrus.
Note: Make certain to click the mortar and pestle and then click on the black mushroom or right click the mushroom and select use. If you click the mushroom, you will eat it. An empty glass vial is mandatory; you can not use any other type of empty container.
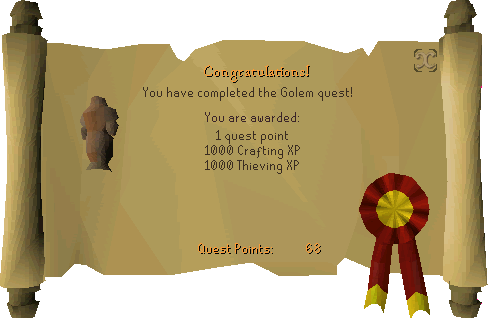
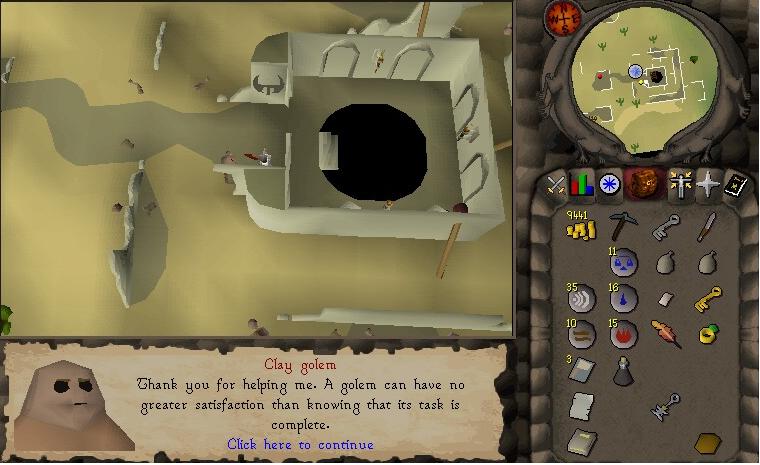
Walk or run south-east back to Uzer. Use the strange implement which is found in the north-west corner of the temple, with the golem and the golem's skull will unhinge and open up. Use the Golem instructions with the golem and the golem will accept his new orders. His task is now complete as well as yours (Picture)!
Frequently Asked Questions
Q: What is a golem?
A: A golem is a mindless automation commonly sculpted from clay, but it may be formed from other materials. Golems come from Jewish folklore in which a rabbi creates one for the purpose of protection. Traditionally, there are three Hebrew symbols etched on the golem's forehead. From right to left, the symbols are "aleph", "mem", and tet". The three letters form the word "amet" or "life". If the aleph is erased somehow, the word becomes "met" which is Hebrew for "death". At this point, the golem would immediately crumble into dust.
Q: What do the mushrooms do if you eat one of them?
A: Nothing. They will not harm or heal you nor affect any of your stats.
Q: Do I need a pair of Ice Gloves to pluck a feather from the phoenix?
A: No. This phoenix is of the non-fiery variety.
Q: What items should I keep from the quest?
A: If you plan do the Shadow of the Storm quest right after you finish The Golem, you should keep the feather, papyrus, black mushrooms, and strange implement as they are needed again. As they are all easily obtained from the area around the ruins though, you can choose to drop them if you need the bank space.
|


 OSRS RuneScape Help
 RuneScape Community Forums
 Skill Guides
 Quest Guides
 City Guides
 Guild Guides
 Mini Game Guides
 Treasure Trail Help
 Miscellaneous Guides
 Dungeon Maps
 Mining Maps
 Items Database
 Monsters Database
 Shops Database
 Tome/Books Database
 Skill Calculators
 Coordinate Locator
 Zchat Clan Chat

 Stuck on something? Want some more tips? Ask on our forums.

