Reward
- 3 Quest Points.
- 20,000 Magic XP.
- Ability to cast Ancient Magicks and use an Ancient Staff. |
 Start Point Start PointThe Bedabin Camp, south-west of the Shantay pass. Members Only |
Difficulty:

Length:
|
Requirements
Skill: 10 Slayer, 50 Firemaking, 50 Magic, 53 Thieving, high Agility for distinct advantage.
Quest: Dig Site, Priest in Peril, Temple of Ikov, Tourist Trap, Troll Stronghold, Waterfall Quest.
Item: 6 Steel Bars, 6 Molten Glass, Charcoal (?), Ashes, 12 Magic Logs, a Blood Rune, a Normal Bone, a Silver Bar, Garlic, Pestle and Mortar, Cake, Spice, Spiked Boots, Tinderbox, 10+ Lockpicks, Facemask, Ice Gloves.
Other: Ability to defeat tough enemies, over Level 150.
Recommendations
Skill: 43 Prayer (for Protection Spells), 50 Ranged, 60 Thieving, 61 Magic, at least 65 Hitpoints, 65 Defence.
Item: Black Dragonhide Armour (if Ranging), Death or Blood Runes and Blue Mystic or Monk Robes (if using Magic), Teleport Devices (Ring of Dueling, Ectophial, Camulet, Amulet of Glory, Games Necklace, all Teleport Runes/Tablets etc), Entangle Spell Runes, Air Staff, at least 15 Prayer Potions(4), Anti-Poison Potions, Energy Enhancing or Restoring Items (Energy/Super Energy Potions, Spotted/Spottier Cape, Boots of Lightness, Strange Fruit), Stat Restore Potions, plenty of Food (Sharks or Monkfish), POH in Pollnivneach, Ring of Life/Recoil, Ring of Charos (a), at least 5,000GP.
Other: Ability to make decisions quickly, quick reaction time. Use Magical Carpets to travel faster in desert.
Rumours abound throughout Varrock and Al-Kharid that an archaeologist has discovered some clues to a large hoard of treasure hidden somewhere deep in the desert south of Al-Kharid. Anybody prepared to offer him assistance in his treasure hunting could well find themselves benefiting from a very large reward indeed...
PLEASE NOTE: This is an extremely challenging quest that will tax your battle powers to the extreme.
Part 1:
Treasure Hunt
Warning: This is a very tough quest; players over level 100 combat have died on it. Always bring an ectophial for quick teleportation. Skim through the guide before beginning. A Stranger (level-95) may stalk you and attack you with a dragon dagger(p) during the quest. Watch out for him.
Step 1
Talk to Archaeologist, at Bebadin camp.
Talk to Archaeological expert (Terry Balando), at Dig Site.
Items needed: 205GP+ (or, if you have Ring of Charos(a), 105GP), 5 Waterskins(4), Knife, Varrock Teleport Runes.
To begin the quest you must speak to the Archaeologist in the Al-Kharid desert. Head down to the Shantay Pass, south of Al-Kharid. Buy a ticket for 5gp to go through. If you have 200gp take a magic carpet ride to the Bebadin camp, otherwise, walk south-west towards the camp.
Ask the Archaeologist if he has any quests, and he'll tell you about a stone tablet he found while excavating. On the stone tablet, he found some etchings. He wants you to go to the Dig Site, ask Terry Balando about the etchings, and return back to him with the findings.
Teleport to Varrock then walk south-east towards the Dig Site. Go into the examination building and find an Archaeological expert. There are two - speak to them both to find out which is Terry Balando. Once you've found Terry, tell him that the Archaeologist at the Bedabin camp wanted some etchings translated. He'll take the etchings and translate them. Speak to him again and he will give you a translation book. The book tells of four missing diamonds, which you will obtain later on in the quest.
Step 2
Talk to Archaeologist, at Bebadin camp.
Help him.
Go to Bandit camp (south).
Talk to Bartender.
Buy Bandit's Brew (650gp).
Talk to Bartender about four diamonds of Azzanadra.
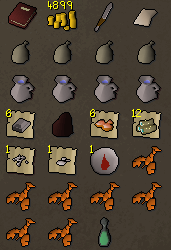 Items needed: Nothing Saradomin or Zamorak related, Translation Book, Shantay Pass, 5 Waterskins(4), Knife, Food, 850GP+, Ectophial; And in note form - 6 Steel Bars, 6 Molten Glass, a piece of Charcoal, Ashes, 12 Magic Logs, 1 Regular Bone and a Blood Rune.
Head back to the Bebadin camp, bringing along all the items needed. Speak to the Archaeologist again and he will ask you to read the book. Choose the option "don't read book" and he will end the conversation.
Speak to him again, and he'll tell you about hidden treasure in the desert. He asks you to be his companion in the search for riches in exchange for a 50% share of the treasure - if it exists that is. Choose the "help him" option.
Make your way south to the Bandit Camp (desert), and go to the pub (Picture). Speak to the bartender and buy a Bandit's brew (temporarily raises Thieving by 1) for 650gp, which will be useful later on.
Next tell him that you heard about the four diamonds of Azzanadra. Apparently, the diamonds were a myth, and he tells you to speak to an elder.
Part 2:
Myth of Azzanadra
Step 3
Talk to Eblis (east of pub).
Use 12 magic logs, charcoal, 6 molten glass, 6 steel bars, normal bone, ashes and blood rune on Eblis.
Go SE from Bandit camp to Eblis.
Look through mirrors.
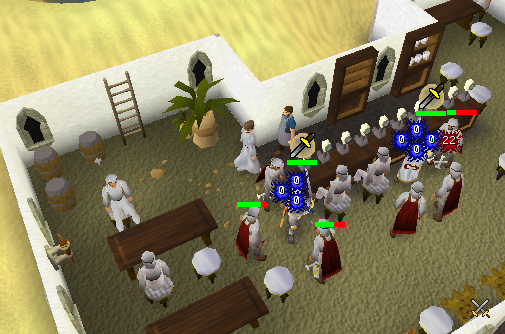
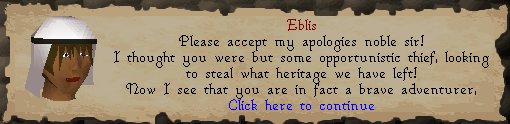
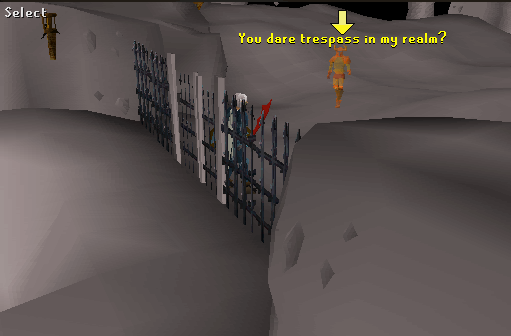
Head east of the pub until you reach a house with Eblis inside. Speak to Eblis, and ask him about the diamonds of Azzanadra. His attitude changes quickly after he realises why you're there (Picture), and he goes on to tell you about the diamonds.
 He explains that the creatures that took the diamonds have infused the power of the stones with themselves. To track down the creatures you will need a particular spell. Tell him you will gather the items required to make the spell. This is where you need the 12 magic logs, 1 charcoal, 6 molten glass, 6 steel bars, a regular bone, ashes and a blood rune. Use these items on Eblis and then speak to him again. He'll set up the Scrying glass in the desert, east of the Bandit camp.
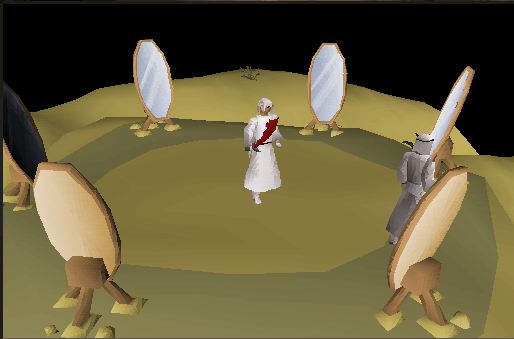
Go south-east of Eblis, and you will see some mystical mirrors (Picture). Speak to Eblis and he will tell you to look into the mirrors to see where the diamonds will be. There are four diamonds, but six mirrors. Eblis says the mirrors show where the diamonds have once been - but, they may not still be in those places. Now you must go on your journey to collect the four diamonds.
Note: The diamonds can be collected in any order.
Blood Diamond 
Step i
Talk to Malak, Canifis pub.
Talk to Ruantun, Draynor Sewers for silver pot.
Ask High Priest on Entrana to bless the pot.
Go back to Malak.
 Items needed: Silver Bar, Garlic, Spice, Ectophial, Lumbridge Teleport Runes or Amulet of Glory.
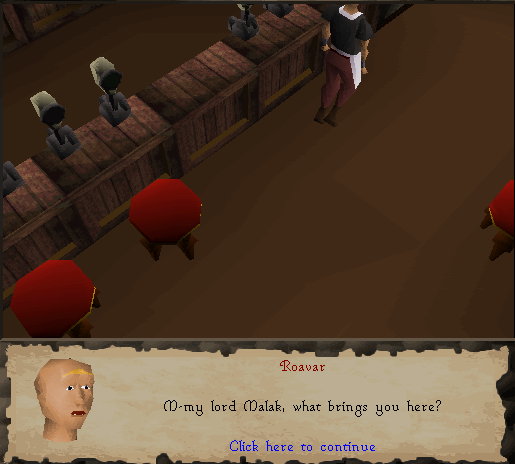
Use your ectophial to teleport to Port Phasmatys. Refill it and head west to the pub in Canifis. When you enter the pub a cinematic will begin (Picture). Malak, a vampire, and another will talk about a tithe being due, and near the end of the conversation Malak will ask you to speak with him. Tell him you are looking for a special diamond.
Malak will give you the blood diamond in exchange for you killing the demon, Dessous. Agree and ask Malak for advice on Dessous, and he will tell you to take a silver bar to the man living in Draynor Sewers and tell him that you need a sacrificial offering pot.
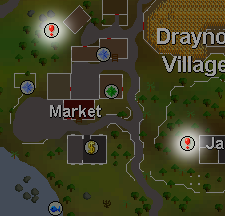
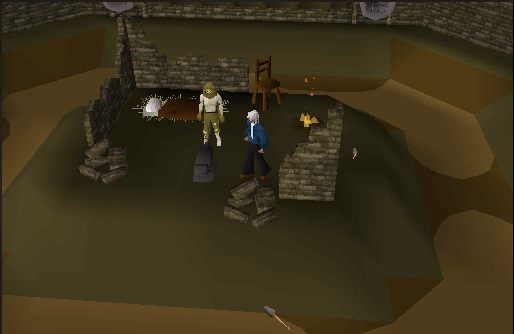
Teleport to Draynor Village and go upstairs Morgans house to collect some garlic. Then go down into the Draynor Sewers. Make your way through the dungeon to Ruantun (Picture).
Speak to him and he will make you a sacrificial offering pot with the silver bar. Leave the dungeon and make your way to Port Sarim with no weapons or armour. Board the boat to Entrana then head to the church and speak with the High Priest. Ask him to bless your silver pot, then use your ectophial to get back to Malak in Canifis.
Step ii
Talk to Malak to add blood to blessed pot.
Grind garlic using pestle and mortar.
Add garlic powder to blessed pot (with your blood in it).
Add spice.
Take your combat gear and blessed pot to Dessous.
Use blessed pot on tomb.
Kill Dessous.
Talk to Malak for Blood Diamond.
 Items needed: Ectophial, Magical Attack Gear (e.g. Mystic), a Prayer Potion(4), Food (Sharks or Monkfish), Runes (for Wave or Blast Spells), Air Staff, Ring of Life, Druids Pouches (for walking through swamp - optional).
Speak to Malak and tell him that you have the blessed pot. He'll use your blood to fill it (you'll lose 5hp). Go to the bank and use your pestle and mortar on the garlic. Add the garlic powder to the blessed pot, then add some spice (Ardougne spice stall). You need to bring this blessed pot with you to Dessous's tomb.
Prepare yourself for the fight at Canifis bank, ensuring you have all the items you want for defeating Dessous (level-139). If you're going to mage him, it's best to use wind wave because you only need blood runes and the air staff.
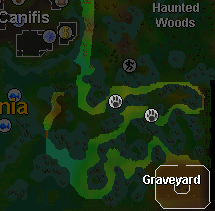
If you've completed In Search of the Myreque, go out the back of Canifis pub and climb down the trapdoor, through the dungeon and out at the other end, then over the bridge. Otherwise, head north-east out of Canifis, then south until you can find your path on the map to the right.
Notes: Dessous's melee attacks are VERY strong. He will use a combination of ranged and magic attacks by summoning bats to attack you. They will hit 5 with magic and 5 with ranged every time no matter what your defence is. If you decide to use the fence or another blocking method, Dessous will teleport right next to you.
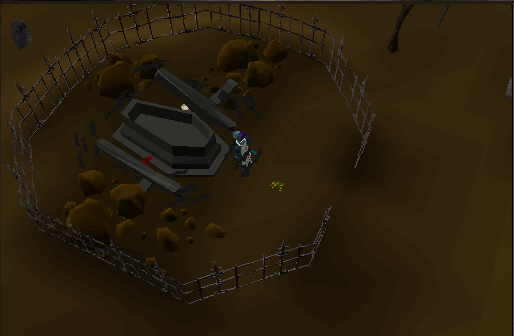
 When you're ready for battle, use the blessed pot on the vampire tomb (Picture) and Dessous (level-139) will attack. Using Protect from Melee is your safest option. Watch your health as you will find it drains fairly quickly.
Return to Malak and tell him you have slain Dessous. He will hand over the Diamond of Blood and allow you to get on your way.
Ice Diamond 
Step i
Talk to Troll Child, icy area north of Trollheim and give him a cake.
Walk through ice gate, talk to Ice Troll.
Kill 5 Ice Trolls.
Watch your stats and hp (see note).
Items needed: Cake, Spiked Climbing Boots, Games Necklace or Trollheim Teleport (requires completion of Eadgar's Ruse), Amulet of Glory or Camelot Teleport, Magical Attack Gear (100+ Fire Blast Runes/150+ Bolt Runes and Chaos Gauntlets for added oomph), Food (Sharks or Monkfish), Super Restore Potions(4) or Restore Potions(4) and Prayer Potions(4), Ring of Recoil (optional).
Make your way to the icy area north of Trollheim. Speak to the Troll Child and give him the cake (Picture). Speak to the troll child again, and he will tell you that a bad man made his mommy and daddy "freezy". Talk to him some more and agree to unfreeze his parents if you get the diamond in return. Walk through the gate and talk to the ice troll.
Note: in this icy area you will not only lose 1hp per 6 seconds, but your stats will also drop very quickly. Therefore, it is advised not to cast fire wave unless you have over 85 magic.
Walk to the Ice Trolls (level-120-124) and turn on protect from melee. Kill 5 ice trolls while watching your Hitpoints and other stats, to make sure you don't fall below the level for the spell you're casting. With each one you kill, a chunk of ice falls away from the cave entrance.
Step ii
Bank to replenish supplies.
Go back to Troll Child.
Squeeze through gate.
Run past Ice Trolls and Ice Wolves.
When ready, walk through narrow part and attack Kamil.
 Items needed: Spiked Climbing Boots, Games Necklace or Trollheim Teleport (requires completion of Eadgar's Ruse), Amulet of Glory or Camelot Teleport, Ectophial (greater likelihood of dieing against Kamil), Magic or Ranged Attack Gear (Mystic or Black Dragonhide, Air Staff or Magic Shortbow/Rune Crossbow), Food (Sharks or Monkfish), 4 Super Restore Potions(4) or 4 Restore Potions(4) and 4 Prayer Potions(4), Ring of Recoil (optional).
Whilst you can continue on while you're here, it is recommended that you replenish your supplies before going on to fight such a formidable enemy as Kamil. Teleport to to Seers' Village or Edgeville bank and restock, then head back to the icy area north of Trollheim.
A good strategy is to range or mage Kamil. Use a magic shortbow and rune arrows, or a rune crossbow and rune bolts. Otherwise do what you did with the Ice trolls and cast fire blast or wave.
Note: Kamil uses ice barrage and an extremely powerful melee attack. He will swap between the two depending on what protect from prayer you have on. Don't forget to drink your restore potions and eat your food or you'll be trying to kill him with a level 40's stats. If he freezes you too much switch to protect from magic and then back to protect from melee. This gives you a few seconds where you can attack him without being frozen. There is the risk of him hitting you high with melee if you don't switch fast enough, so be careful.
Go to the ice gate, where the troll child is. Squeeze through the gate again, and go south-east through the aggressive trolls to the cave entrance. Follow the path along, past the Ice Wolves (level-124-132) and you will eventually come to a narrow path.
When you walk past the narrow part you will feel an evil presence nearby. Heed the information in the note above then put protect from melee on and walk in further; Kamil (Level-154) will attack you. Kill Kamil and he will drop two chocolate cakes and a super restore potion. You will need at least three pieces of food to continue on after here.
Step iii
Follow Ice Path while wearing spiked boots and eating as needed.
Go through Ice Gate.
Follow path until the end, to frozen trolls.
Use melee to smash the ice off.
Talk to them and go back to Ice Child for the Diamond.
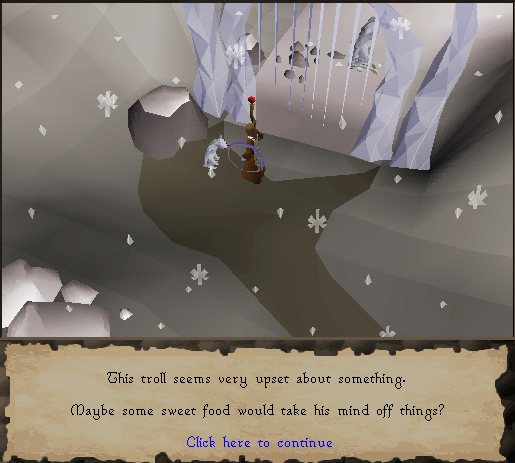
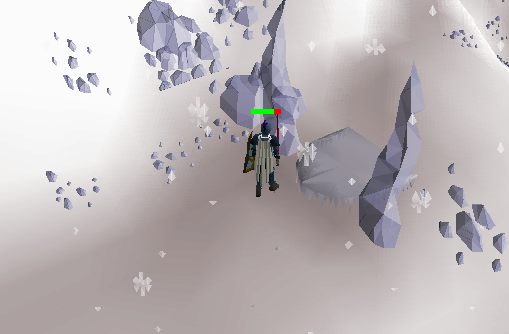
After killing Kamil follow the ice path until you find yourself at the Ice Path (Picture). Wear your spiked boots and climb onto it. If you haven't already done so, drink some stat restore potion to get your levels back up.
This is a very long and icy path, so don't forget to eat while you're walking on it, as you do lose a fair amount of hit points (Picture). Keep walking until you reach an ice gate.
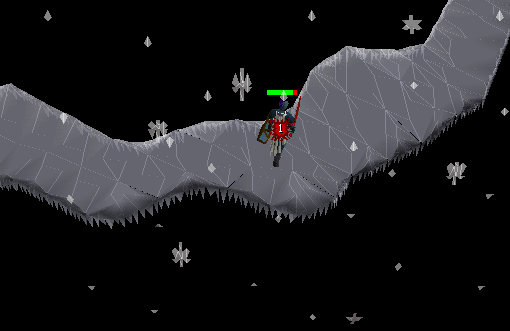
 Go through the gate and follow the path to the end, where you will find two ice-cubed trolls (Picture). Drink a dose of the super restore potion dropped by Kamil if your stats are low, and smash the ice block. You must use a melee weapon or your fists, to break open the ice. Each ice block has 10hp so it shouldn't be too hard to get the parents out. (Using fire bolt here is suggested)
Tell the parents that you let them out so that they would give you the diamond that the troll child promised, and you'll find out that the troll child had the diamond all along. The parents will take you back to the ice gate where their child is and he will give you the ice diamond (Picture).
Smoke Diamond 
Step i
Go to Smokey Well, west of Pollnivneach.
Wear facemask, go down.
Light 4 torches in rapid succession, then open the chest.
Items needed: Shantay Pass, 200GP (or, if you have Ring of Charos(a), 105GP), Ice Gloves, Facemask, Tinderbox, Magical Attack Gear (no hat), Air Staff, Water Blast/Wave Runes (Fareed is weak against Water Spells), 3 Prayer Potions(4), 3-5 Energy Potions(4), Food (Sharks or Monkfish), Ectophial.
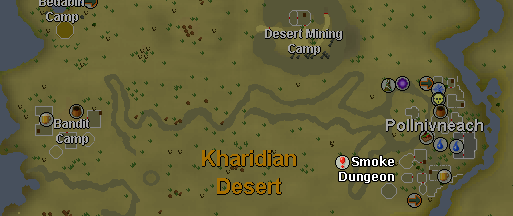
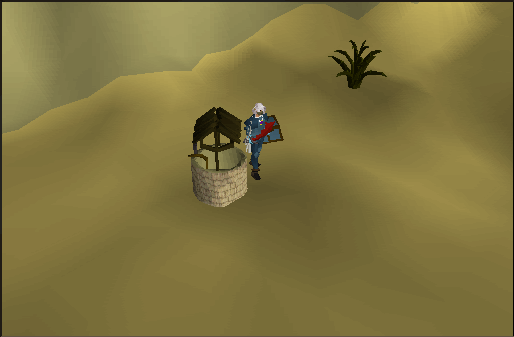
Go through the Shantay Pass and make your way to Pollnivneach (Map) by Magic Carpet. Once there head to Ali the Operators tent and go west; you will soon come to a Smokey well (Picture). Try to climb down, and it will tell you that there's a lot of dust down there. Put on your facemask and climb down.
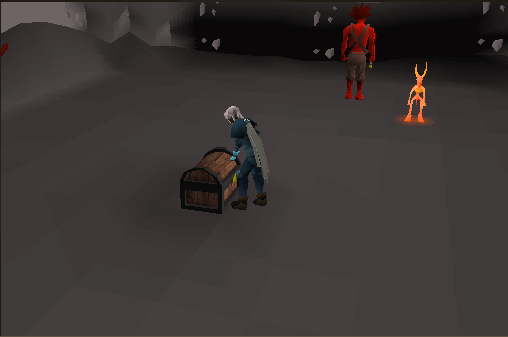
From the entrance walk as far north-west as you can go until you arrive at an unlit torch (Picture). Be prepared to run with 100% energy as there is a time limit on lighting the four torches. They can be found in the south-east, south-west, north-east and north-west corners of the dungeon. To have a better chance of getting them all done in the time limit, light them with your tinderbox in this order: NE, SE, NW, SW. Once they're lit, go to the center area and open the chest. Take the warm key (Picture).
Step ii
Go to Fareed's cage to the east.
Equip ice gloves, use key on door.
Kill Fareed.
Now that you have a warm key make your way to the eastern side of the dungeon. At the fork between the north and south paths you will notice a gate.
If you aren't already, equip your ice gloves then use the key on the door. Fareed (level-167) will appear (Picture) and attack you with melee. Put on protect from melee and cast water spells on him.
 You will receive the Smoke diamond in your inventory when Fareed is dead. Teleport out when you're done.
Shadow Diamond 
Step i
Talk to Rasolo, NW of Fishing guild.
Go to Bandit Camp with items needed.
Use picklocks to unlock secure chest (failing will result in being poisoned).
Pickpocket bandits (not in the pub) if you run out of picklocks.
Items needed: Means of Teleporting in or near to Al-Kharid.
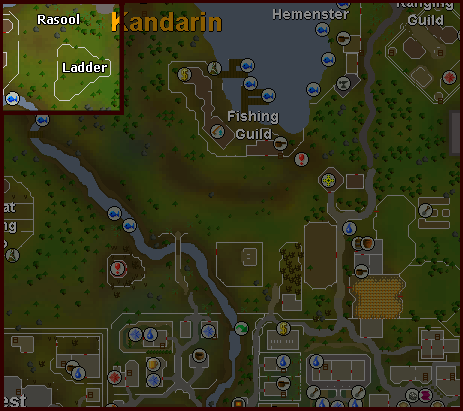
Make your way to a fenced-in area just north-west of the Fishing Guild (Picture). Find Rasolo and talk to him about the diamonds (Picture). Rasolo will tell you that the shadow diamond is in a dungeon guarded by a fearsome warrior named Damis. To access this dungeon you will need a ring of visibility. Rasolo will give you the ring if you recover a gilded cross that was stolen by a bandit known as Laheeb.
Items needed: 15 Lockpicks, Bandit's Brew, Shantay Pass, 200GP (or, if you have Ring of Charos(a), 100GP), 5 Food (Lobsters or better), 2 Waterskins(4), 1 Super Anti-Poison Potion(4), Ardougne Teleport Runes.
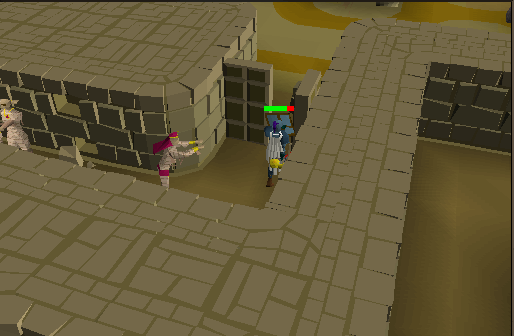
Head off to the Shantay pass, ensuring you have all the necessary items. Hop on a magic carpet and get taken to the Bebadin Camp. From here go south to the Bandit camp. In the south-west tent of the Bandit camp you'll find a secure chest (Picture). Drink your Bandit's brew to temporarily increase your thieving level by 1. Click "open secure chest" and it will ask you for confirmation. Click "yes" and you will attempt to open the lock.
Note: Failing to open the lock will result in your lockpick disappearing and a poison gas cloud dealing 3 damage on you. If you happen to run out of lockpicks, simply pickpocket a bandit and you'll eventually get another. Do not walk into the Bandit Pub or they will all attack you at once. A high thieving level does not guarantee you'll open it on your first few tries.
The chest has three locks and you will need to pick each of them in succession to open the chest. When you've opened the chest, you will receive a gilded cross.
Step ii
Take gilded cross and teleport to Ardougne.
Withdraw items needed for defeating Damis.
Give Rasolo gilded cross for ring of visibility.
Equip it and go down ladder to SE (in fenced area).
Run east, avoid giant skeletons.
At ends/forks go north, east, south, east, north, east.
Kill both forms of Damis.
Collect the Shadow Diamond and leave the dungeon.
Items needed: Magical Attack Gear (Mystic, Air Staff) or Dragon Dagger(p++) and Super Strength/Attack Potions, 7 Prayer Potions(4), 1 Super Energy Potion(4), 60/100 (Wave/Blast) Spells, Runes for Binding Spells, Ectophial, Gilded Cross, Food (Sharks or Monkfish).
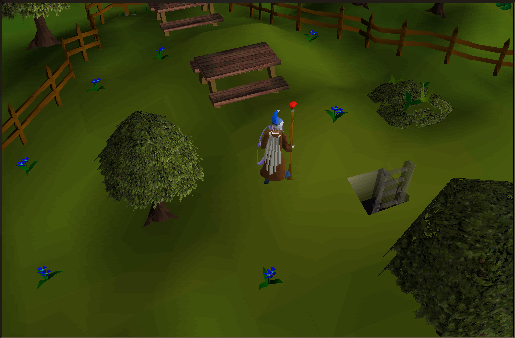
Teleport to Ardougne and go to the northern bank. Withdraw the items you will require for defeating Damis (level-103/174). When you're ready go back to Rasolo, north-west of the Fishing guild, tell him you have the gilded cross and he'll give you the ring of visibility. Wear it and head south-east to the small fenced area where a ladder should now be visible (Picture).
 Climb down and begin running east straight away to avoid the Giant skeletons (Invisible Dungeon (Damis' Lair)). Keep going east until you reach a path leading north. Take that path until you come to a fork. Go along the eastern path and then head south until you reach the end. Go east then north at the first fork and east again, and you will be at an open area.
Note: This is a multi-combat area so the skeletons and shadow hounds will attack you as well while you're trying to kill Damis. Damis has two forms. The first form is level 103 and doesn't drain any prayer or stats, so use Protect from Melee, lure Damis near the non multi combat zone (which is where you entered from) and mage him. The second form is level 174 and is quite dangerous as he reduces your prayer quite rapidly.
An alternative to using magic, is using a Dragon dagger(p++)'s special attack. Hide in the square bit of the multi combat area at the top of the open area. Turn on Protect from Melee and jump at him, using your DDP++ special attack. Go back to recharge your special bar and repeat the process until he is killed. Using a super strength and super attack potion will greatly aid the speed to defeat him. For extra help carry a ring of recoil, as it will take a good portion of Damis' hp. Bringing two may help in case one shatters.
 To begin the battle, run north and Damis (level-103) will appear and attack you. After you kill the first form, his second form appears as Damis (level-174).
If you're having trouble fighting, use your ectophial to teleport out and reassess how you should tackle fighting him. When you've killed Damis, he will drop a shadow diamond.
Part 3:
The Pyramid of Azzanadra
Step 4
Talk to Eblis back at mirrors.
Place diamonds around pyramid.
Blood: NW.
Smoke: NE.
Ice: SE.
Shadow: SW.
Items needed: 80,000GP (if you want to buy the Staff at the end), 4 Energy Potions(4), 3 Prayer Potions(4), Anti-Poison Potions(4), Boots of Lightness, Food, means of Teleporting out, keep your weight as close to 0kg (or below) as possible.
Now that you have all four diamonds head back to the Shantay Pass. Withdraw the four diamonds: blood, ice, smoke and shadow, as well as 80,000gp if you wish to buy the Ancient Staff.
Once you have all your gear head back to where the six mirrors are (south-east of the Bandit Camp). Speak to Eblis and tell him you have all four diamonds. Eblis tells you that Azzanadra was trapped in a stone structure to the south of the mirrors. He will say that you have to put the diamonds on the four obelisks surrounding the stone structure.
Go to the north-west corner and place the blood diamond on the obelisk. Now go east and use the smoke diamond on that obelisk. Go south and use the ice diamond on the obelisk. Finally, go west and use the shadow diamond on the last obelisk.
Step 5
Walk to top of pyramid, go through door.
Read the note.
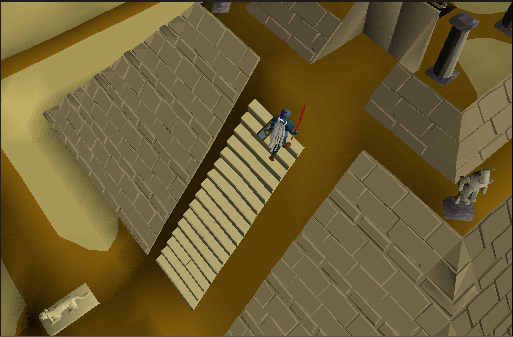
Make your way to the northern side of the Pyramid and go up the stairs into the entrance (Picture). There are four levels of the pyramid to complete.
Note: Each level contains Mummies (level-103) and Scarabs (level-92) that randomly appear and attack you. If you get snagged on a trap, a trapdoor opens under you and you will be taken outside the pyramid and will have to start again. Note that when Scarabs begin to appear, you will momentarily be frozen. The Scarabs also poison on contact so try to stay away from them.
When you're ready, go through the door and climb down the ladder. The traps within this dungeon are not random. If you follow the steps correctly with a weight close to or below 0kg, and while using the Protect from Melee prayer, you should be able to do it easily.
Step 6
Climb down the ladders until you reach Azzanadra's room.
Enter and talk to Azzanadra.
Go to Eblis to complete the quest.
Click each step below and its corresponding map will appear to the right.

- Simply follow the path and go north into the first room you come to. Climb down the ladder.
- Go west, all the way south, all the way west and then north through a small hallway. Go east to the ladder and climb down it.
- Go to the north-west corner and head south. Then head towards the south-east corner. Now go west to a large room with a ladder, climb down it.
- Head clockwise from the direction at which you entered; head west, north, east, south, then west to a door (Picture). Go in and speak to Azzanadra (Picture).
Azzanadra asks you how the battle goes and asks you about some places that you've never heard of before (Picture). Azzanadra will reward you with the gift of knowledge; the ancient magicks.
Head back to Eblis at the mirrors (north of the pyramid). Speak to him and he will eventually ask if you wish to buy an ancient relic, the ancient staff, for 80,000gp. This staff has a high strength bonus and allows you to auto-cast ancient magick spells. If you choose not to buy it now, you can always come back at another time. If you lose the one you bought from Eblis, you cannot buy another one back from him.
Frequently Asked Questions
Q: I lost the diamonds! Do I have to fight the demons again?
A: Thankfully no. You can get the Ice diamond back from the Ice Troll Child. If you go back to the areas where you fought the Blood, Shadow and Smoke demons, the diamonds will appear on the ground.
Q: How do I swap between ancient magicks and my regular list?
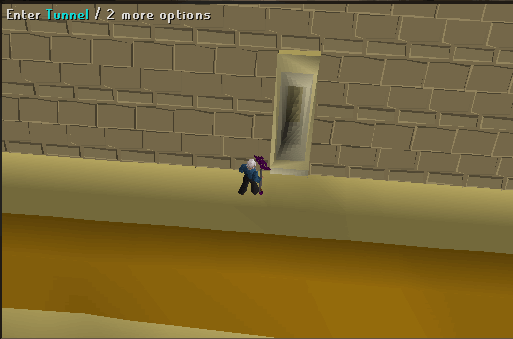
A: Do so by returning to the pyramid, and entering via the tunnel Azzanadra created. This tunnel is found at the back of the Pyramid (south side - Picture) Pray at the altar and your magic list will swap.
Q: I sold my Ancient staff! How do I get another one?
A: The only way to obtain another ancient staff is by buying one off of other players; which can be quite costly. Mummies in the giant pyramid also drop them but the staffs are a rare drop.
Q: Do I need to complete Desert Treasure to be able to get/wear the ghost robes?
A: No, you just need to start the part of the quest where you get the ring of visibility.
Q: I lost my Ring of Visibility. How do I get it back?
A: Ask Rasolo for another.
Q: When I try to talk to the Archaeologist, he won't talk to me. Why?
A: You need all of the quest requirements or he will be 'lost in his own thoughts'. |


 OSRS RuneScape Help
 RuneScape Community Forums
 Skill Guides
 Quest Guides
 City Guides
 Guild Guides
 Mini Game Guides
 Treasure Trail Help
 Miscellaneous Guides
 Dungeon Maps
 Mining Maps
 Items Database
 Monsters Database
 Shops Database
 Tome/Books Database
 Skill Calculators
 Coordinate Locator
 Zchat Clan Chat
 Stuck on something? Want some more tips? Ask on our forums.

