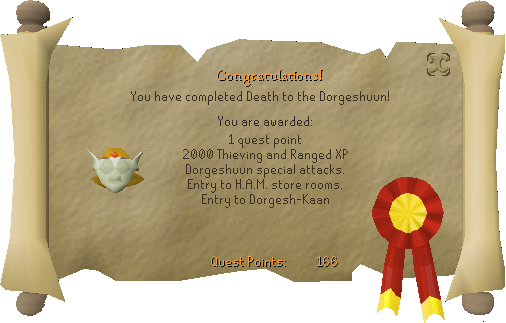
Reward
- 1 Quest Point.
- 2,000 Range XP, 2,000 Thieving XP.
- Ability to use Dorgeshuun Bow and Bone Dagger's Special Attack.
- Access to HAM storage caves and Dogresh-Kaan. |
 Start Point Start PointDorgeshuun Mines, speak to Mistag. Members Only |
Difficulty:

Length:
|
Requirements
Skill: 23 Agility, 23 Thieving.
Quest: The Lost Tribe.
Item: 2 Full Sets of H.A.M. Robes, any Pickaxe, Light Source (Bullseye Lantern or Mining Lamp), Rope ( Required to enter the mines for the first time).
Other: Ability to defeat a Guard (Level 50) and three Guards (Level 28).
Recommendations
Skill: 50+ Combat.
Item: Armour (Adamant or better), Food (Lobsters or better).
Humans have been visiting the Dorgeshuun mines for some time now, but no Dorgeshuun has visited the surface since the signing of the Lumbridge-Dorgeshuun treaty.
The Dorgeshuun Council fears that the HAM group may be planning another attack, and want to send an agent to the surface to investigate. But they do not want to send someone to the surface without a guide...
Part 1:
A Dorgeshuun Agent
Step 1
Go through the hold and talk to Kazgar.
Give Zanik the robes.
Take her on the tour and talk to everyone on the way.
Items needed: All 'Required' Items.
Go to Lumbridge kitchen's cellar and through the hole in the wall. Talk to Kazgar at the beginning of the mine and he'll take you directly to Mistag. Talk to Mistag, who'll tell you the Dorgeshuun are trying to send an agent to the HAM headquarters - they are fearing a new attack. Mistag will tell you to collect HAM robes for you and their agent, Zanik back in the cellar.
Talk to Zanik and she will ask you to give her a tour of Lumbridge. You will automatically give a set of robes to her. Head upstairs and start out the tour by talking to Zanik and using the option "Okay." Then head outside and you will go to a cut-scene with Zanik will talk about the sun.
On this tour you will need to talk to any 'surface' goblin near the castle (opposite the bridge for example), Father Aereck (the priest), Duke Horacio (second floor of the castle), Hans (wandering the castle grounds), a store keeper at the General Store, and all of the Lumbridge Guides (Donie, Hans, Cook, Bob, a Man and the Lumbridge Guide). She will learn many things about our world, and even buy some item from the store.
Step 2
Ask Zanik about scar.
Put on HAM robes and take Zanik to the hideout.
Go down and talk to the people listened to the right.
Get the guards to turn.
Now ask Zanik about her scar and you'll go into a cut-scene. If you don't, you haven't talked to all the NPCs you needed to yet. You'll find that her scar is from drinking Guthix Tears and the mark is a sign that she is important in this world.

Zanik will put on her set of HAM robes, you do the same, and take her to the HAM hideout west of Lumbridge. Zanik will follow you wherever you go just like a cat. If you see Zanik get stuck behind something, don't worry, she will go through the obstacle and keep following you.
Pick the lock to the trapdoor and go down (This does not require a lockpick). Talk to a guard, a HAM member, Sigmund and Johannus. You will also hear the preacher preaching, and Zanik will comment on it. You and Zanik will learn the HAM is trying to attack the Dorgeshuun again. After talking all them Zanik should notice a trapdoor behind the stage. Picklock it and go down.
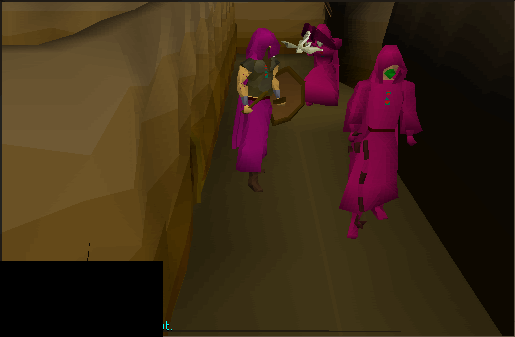
Downstairs you will have to get by several guards. You must get them to turn their back to Zanik while she shoots them with her crossbow (Picture).
Step 3
Divert each guard's attention using the steps to the right.
 If you are caught at any stage trying to divert the guards, you will be sent to jail and Zanik will have to free you. For the first guard just walk to the west of him and his back will be exposed to Zanik.
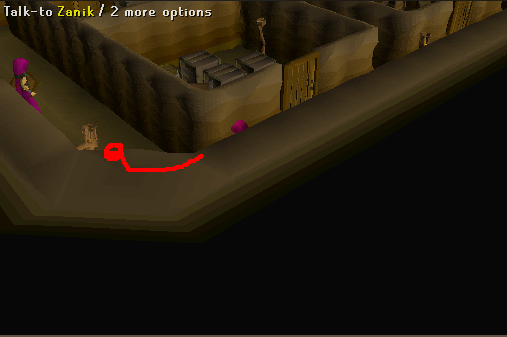
For the next guard on the west squeeze into the crack and squeeze out the other side when the patrolling guard walks past (Picture). Run up to the guard on the west quickly, because the patrolling guard can spot you the entire distance of the hallway. Go to the guard on the west and talk to him. Zanik should kill him. Zanik will ask if the coast is clear and you will say there is a patrolling guard. Zanik will then ask when the patrolling guard has his back to her - say NOW! at the correct time.
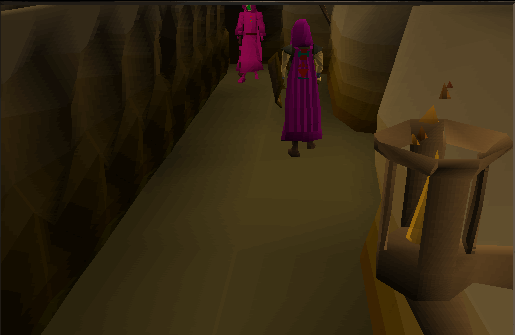
For the guard on the east corridor, talk to Zanik and click follow me. Get as close as you can to the corridor without being seen, talk to Zanik and say "wait here." Go into the hallway and head south so the guard follows you (Picture). Zanik should do the rest.
For the last guard, go to the east side and have Zanik "wait here", then go to the other side (Picture) to draw attention to the guard. Let Zanik kill him (Picture).
Step 4
Listen at the door.
Look for Zanik's body and inspect it, then take her to Juna.
Talk to Juna and collect 20 tears.
Now go and "Listen" to the door. You will try to hear but you can't hear anything. Only Zanik can hear them talking. Before Zanik can say anything, you will be caught by a guard. You will be thrown in the jail. When you wake up in the jail, you do not see Zanik next to you. You will call out for Zanik, who is nowhere to be found. Leave the HAM headquarters and look around the outside. You should find Zanik's body by some bushes.
Inspect Zanik - you'll notice that she's dead - but you also notice her head mark is glowing brightly. You will tell yourself to take her body to Juna by the Tears of Guthix. You will automatically pick up Zanik; now you must head to the Tears of Guthix mini-game site and talk to Juna. Just head southeast and climb down the hole into the dungeon. Make your way through to the back of the dungeon near the Giant frogs and go through the cave to Juna. Talk to Juna, and she will say that Zanik's death was premature. You can revive her, but you will have to collect 20 tears to do so.
Juna will give you Zanik's tear bowl. Collect 20 tears (you have no time limit time). After reviving her she will tell you about the spying she heard, which will then go to a cut-scene. She will say HAM will try to flood out the caves by using the River Lum and the watermill. The dwarves from Keldagrim are providing equipment to help destroy the Dorgeshuun.
Part 2:
Showdown
Step 5
Talk to Zanik, Lumbridge cellar.
Go to watermill, take crate Zanik jumps in.
Talk to the dwarf and go into the cave.
Go west, then attack Sigmund.
Tunnel out and talk to Mistag.
Items needed: Light Source, Full HAM, Pickaxe, Armour/Weapons, Food.

Juna will say that you must head over to the watermill on the River Lum to prevent HAM from flooding the Dorgeshuun caves, but, before you can continue the quest, you must talk to Zanik who is now in the Lumbridge cellar waiting for you. Tell her to come with you, and head over to the water mill opposite the Lumbridge cow pen. Search the crates on the side and Zanik will have the idea to jump in (you must have no weapon or shield equipped, and must be wearing full HAM). Let Zanik jump in and you will pick up the crate.
Talk to the dwarf and he will see you are a HAM member. He will let you go down the trapdoor. Go down the trapdoor next to the building. Once in the cave Zanik will tell you to defeat Sigmund. Go west and the guards will attack you. Zanik will help with her crossbow. Sigmund will use protect from melee, so kill all the low guards first so Sigmund will switch to range protect from Zanik's bow. When you're about to kill Sigmund he'll disappear - he had a ring of life.
Now that the leader is gone, you can ruin the HAM plans. Go over to the drill and smash it. This will destroy any chance of HAM to flood the caves. Zanik says to head back to the caves. Head south down the tunnel. Use your pickaxe on the hole at the end of the tunnel and Zanik will lead you back to the Dorgeshuun caves.
You arrive next to Mistag and begin talking to him. Keep talking and you will learn the special attack of the Dorge bow.
Q: What is full H.A.M.?
A: Full ham is hood, shirt, skirt, gloves, cloak, boots and logo.
Q: How do I get Zanik back if I send her away during the quest?
A: You can find her in the cellar of Lumbridge Castle and take her out again.
Q: How do I get Zanik's body back if I die with her
A: You can retrieve her body from the bushes where you originally found her. |


 OSRS RuneScape Help
 RuneScape Community Forums
 Skill Guides
 Quest Guides
 City Guides
 Guild Guides
 Mini Game Guides
 Treasure Trail Help
 Miscellaneous Guides
 Dungeon Maps
 Mining Maps
 Items Database
 Monsters Database
 Shops Database
 Tome/Books Database
 Skill Calculators
 Coordinate Locator
 Zchat Clan Chat

 Stuck on something? Want some more tips? Ask on our forums.

